
Before starting the tutorial on installing Samsung firmware using Odin let me give you small intro about Odin and its purpose. Odin enables you to flash the latest firmware, future updates, custom ROMs, and recoveries on any Galaxy smartphone. Odin also helps to unbrick and wipe the device completely.
For Brief Detail: WHAT IS ODIN? DOWNLOAD ODIN ALL VERSIONS FOR SAMSUNG GALAXY DEVICES
Odin not only lets you flash stock firmware, but it also helps you to recover or unbrick a Samsung device. Odin can help you with flashing stock firmware, install the update from another region, fix crashing issues and appliance stuck at boot loop.
Warning: Flashing firmware using Odin is not Samsung correct way of doing it. You can use Odin to unroot, unbrick and reinstall an official firmware. You can also flash the firmware of another country and change the region of your device. Please make sure that your downloaded firmware is for your model precisely and make a backup of your device. UptoAndroid will not be held responsible for any damage to the equipment during the process. Proceed at your own risk.
Prerequisites
- Samsung USB Drivers
- Latest Version of Odin
- Stock ROM (compatible with your device)
- Minimum 30% mobile battery
How to Flash Samsung Stock ROM using Odin
Step 1: Make sure you’d install Samsung USB Drivers on your system if not download and install them.
Step 2: Find and download stock ROM according to your device model. Please make sure that the ROM you’d downloaded is for your model precisely. We’ve uploaded maximum Samsung ROMs here if we missed any let us know. Alternatively, you can visit SamMobile and Samsung-Updates to find ROM for your device.
Note: Extract the downloaded stock ROM to get .tar.md5 file.
Step 3: Turn off your Samsung Device.
Step 4: Boot your device in download mode. To enter in download mode press and hold Volume Down key, Home key and Power key together.
Step 5: Press Volume Up key to continue boot in download mode.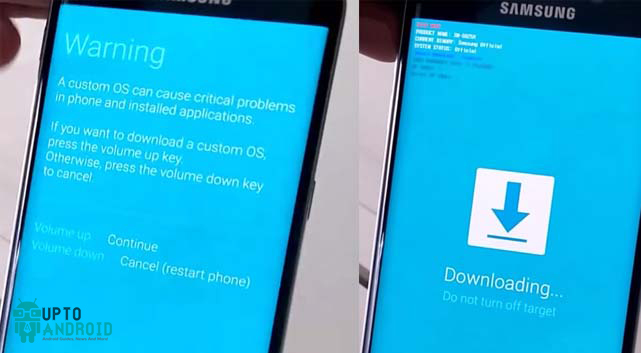
Step 6:[ Download and unzip the latest version of Odin. After extracting run Odin3_v*.exe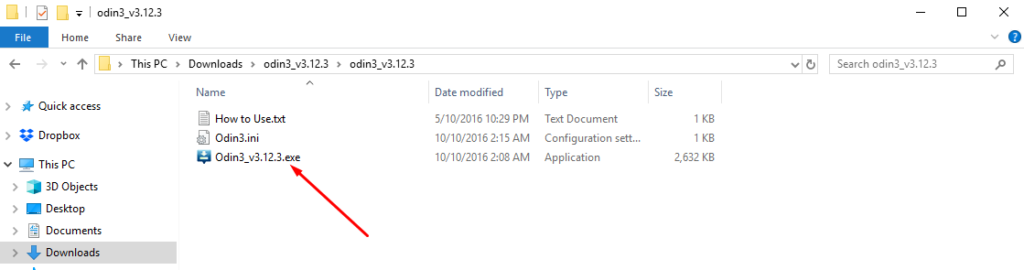
Step 7: Connect your phone to the computer. If you have installed Samsung USB Drivers successfully Odin will recognize your device and will display “Added!!” message at the lower-left panel.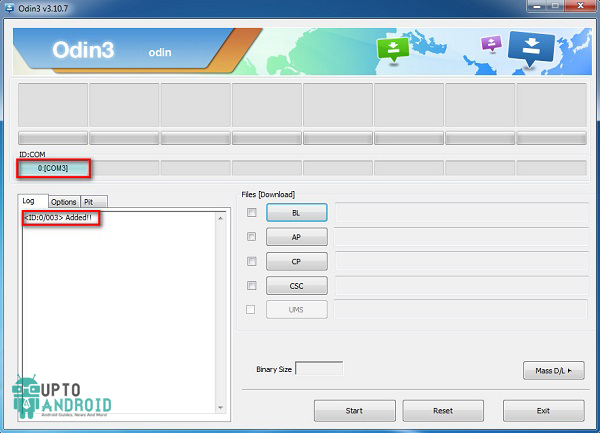
Step 8: If your device successfully added and recognized by Odin, click on “PDA” (or AP) and select .tar.md5 file you get in step 2.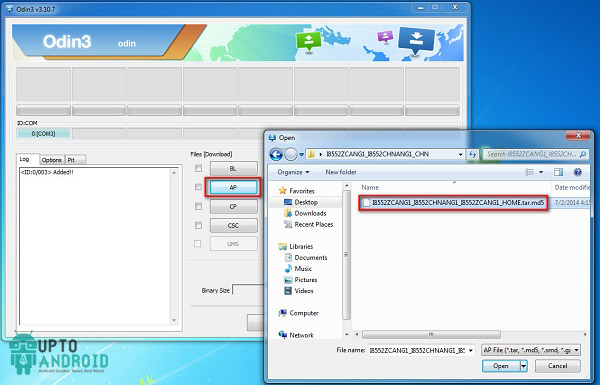
Step 9: Now, click on the start button.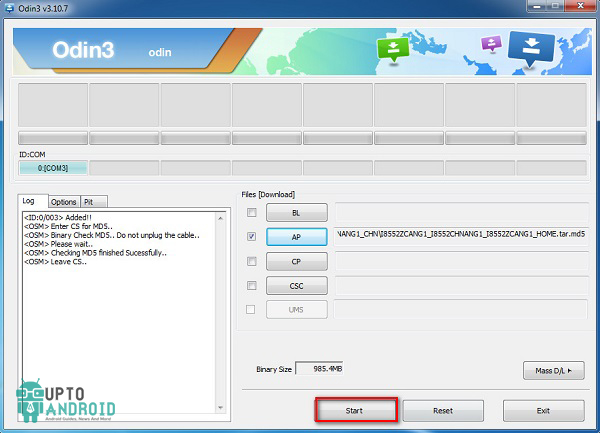
Step 10: On success, you’ll see PASS! Message and the box will turn GREEN. The will reboot automatically.
Step 11: If you stuck in a boot loop then you’ll have to wipe data once. To do so, enter in Stock Recovery Mode by pressing Volume Up key, Home key, and Power key together. By using Volume Down key navigate to “Wipe data/factory reset” and select it by using Power key.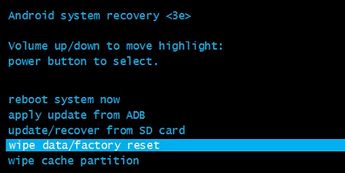
Step 12: Once done, reboot your device and your device will restart without any issue.
That’s it and you are done flashing ROM into your Samsung Galaxy Device; if you have any issue during the process do let me know in the comment section below.


